Skin Transfer
发布于:2024-11-21
Overview of Functionality
SkinTransfer allows you to transfer weights from a source mesh to a target mesh and export the converted weighted mesh. For example, it can copy the skin weights of a character to clothing.
Usage Steps
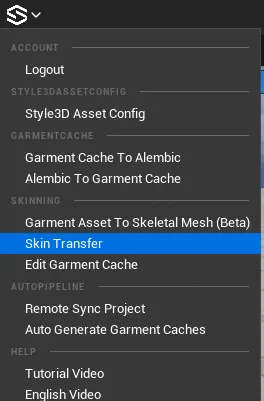
1. Open SkinTransfer Panel
Note: The enterprise account has SkinTransfer permissions.
Parameter Description
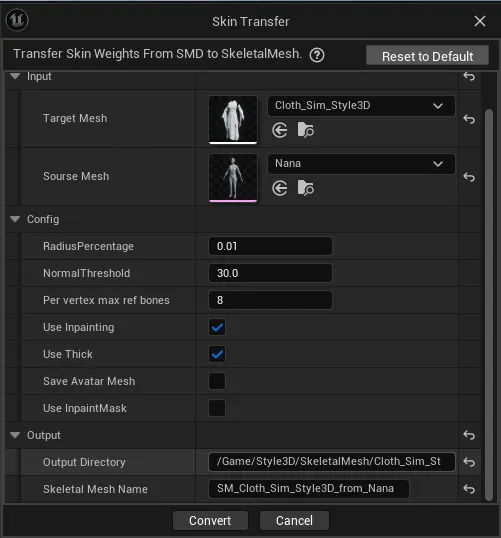
Para | Meaning |
|---|---|
Target Mesh | Style3D Clothing Asset (SMD or General Mesh Clothing) |
Source Mesh | Character Skeletal Mesh (Avatar skeletal mesh should not contain scaling). |
Radius Percentage | Radius Percentage: The search radius ratio is based on the diagonal length of the bounding box of the source mesh's axes. Vertices beyond the search radius are considered unmatched. Vertices within the search radius are further judged based on the normal matching threshold. |
Normal Threshold | Matching Normal Threshold: Vertices beyond this value are considered unmatched. It represents the angle between the normals of the target mesh vertices and the source mesh vertices. |
Per vertex max ref bones | Maximum Reference Bones: The number of bones affecting the same vertex. |
Use Inpainting | Use InPainting Algorithm to Calculate Unmatched Areas: If disabled, all vertices are considered matched. When this option is off, the Use Match Lock-Map option is not effective. |
Use Thick | Use Thickness for Exported Mesh Clothing Part: If disabled, single-sided meshes are used. |
Save Avatar Mesh | Include Character Mesh in Exported Mesh: If disabled, only the clothing mesh is exported. |
Use Inpaint MAsk | Use Matching Lock Map: If checked, a custom matching map is used to lock the matching state of some vertices. |
Output Directory | Export Mesh Path |
Skeletal Mesh Name | Export Mesh Name |
2.InPainting Settings
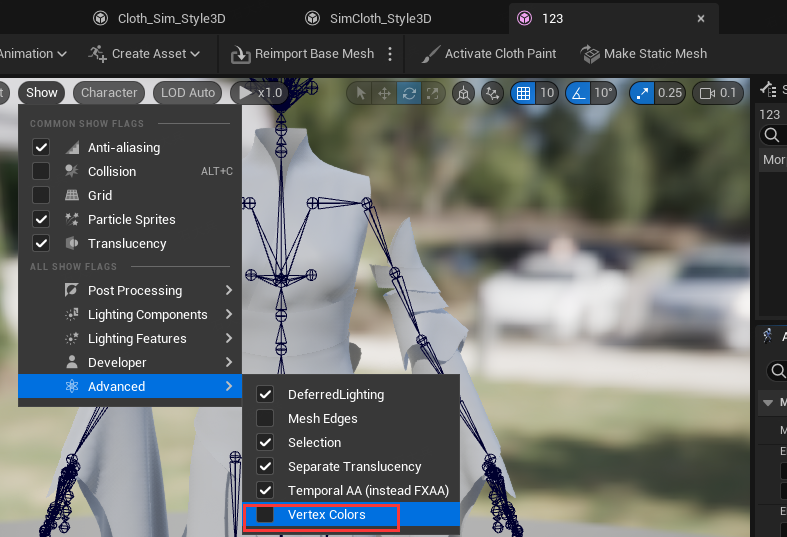
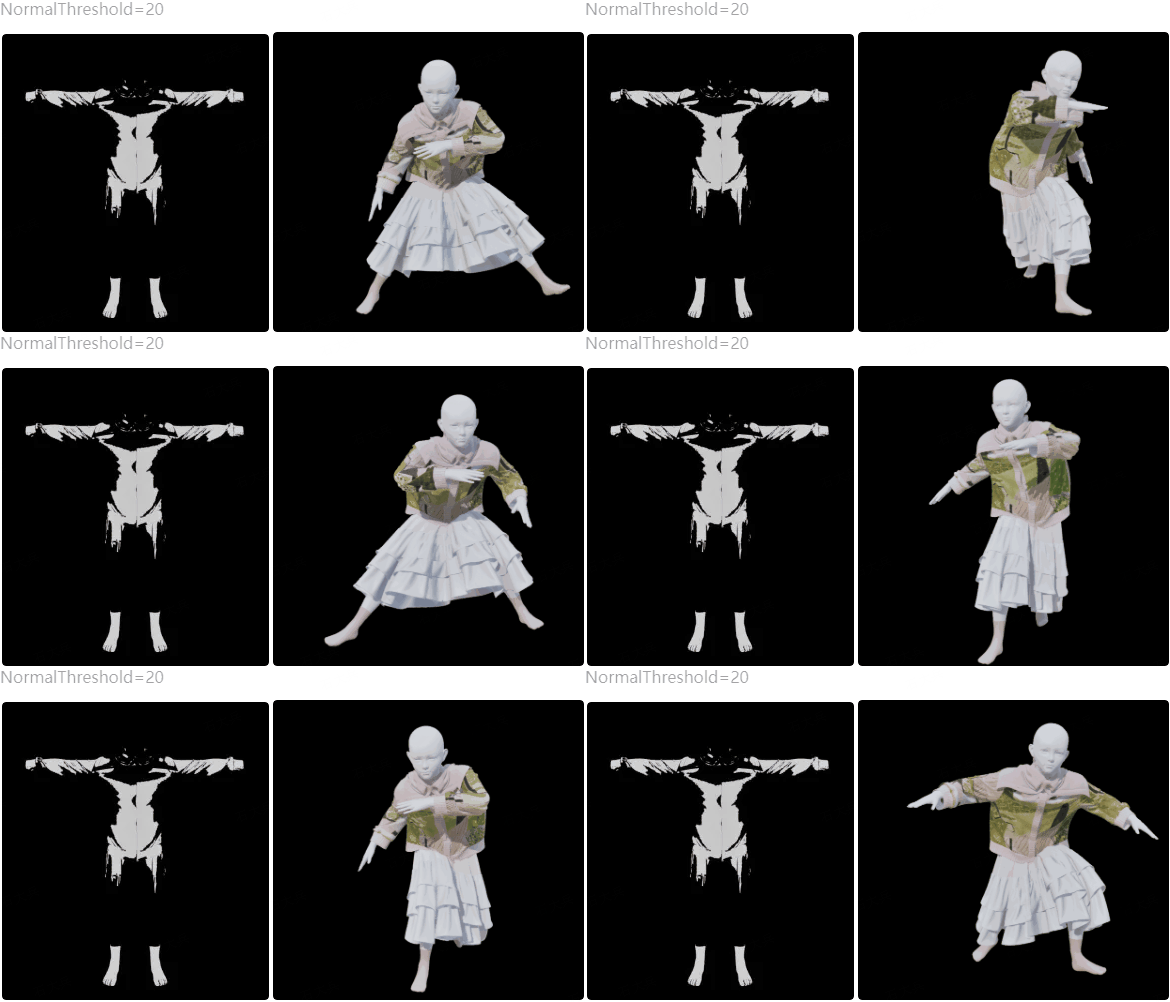
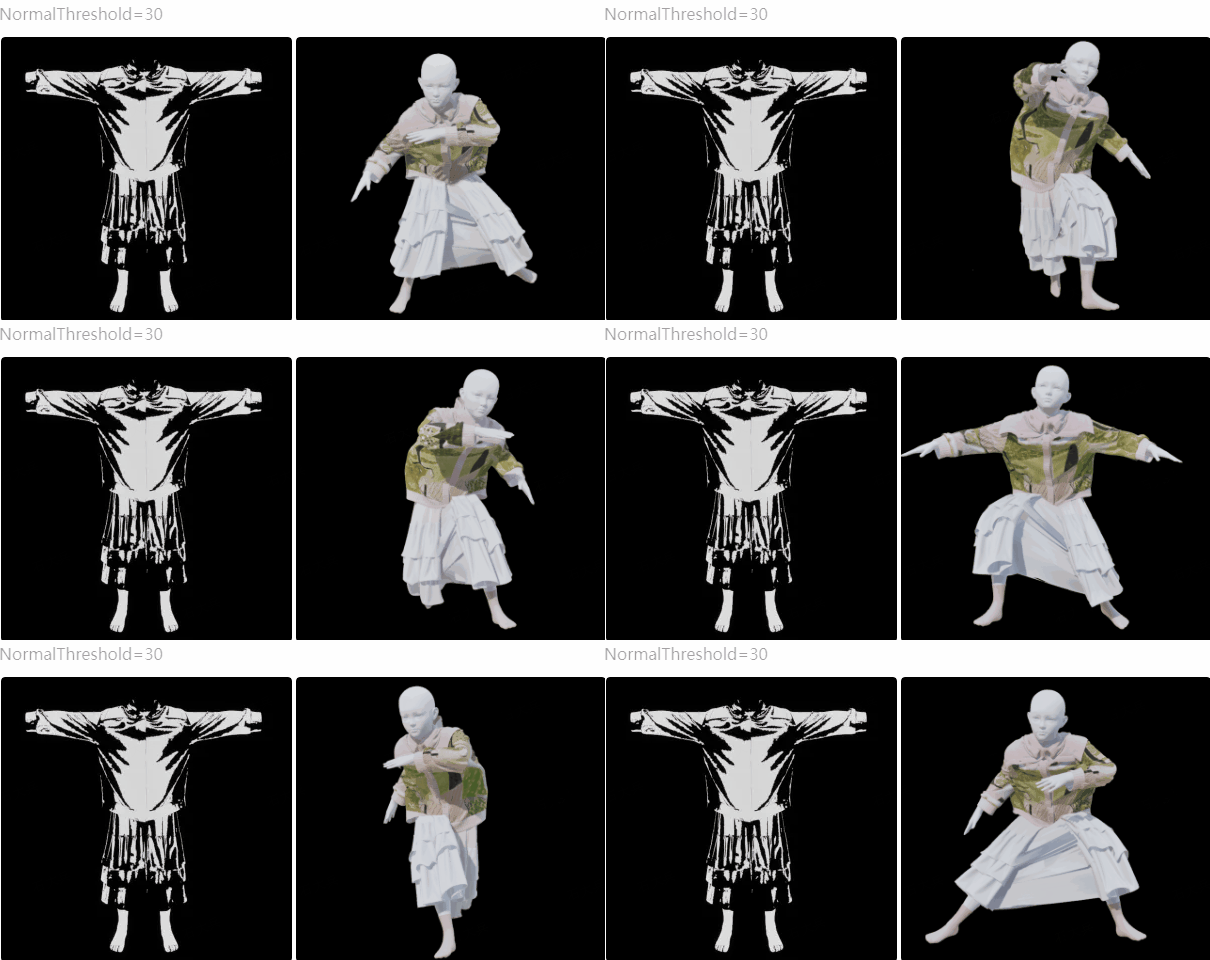
Inpainting Area: When using the Inpainting algorithm, you need to adjust the unmatched area (only the unmatched area executes the InPainting algorithm to recalculate weights) to get better weight transfer results. The matching results of vertices can be viewed in the vertex color in the Advanced section of the Skeletal Mesh Editor. White areas indicate matches, black areas indicate mismatches.
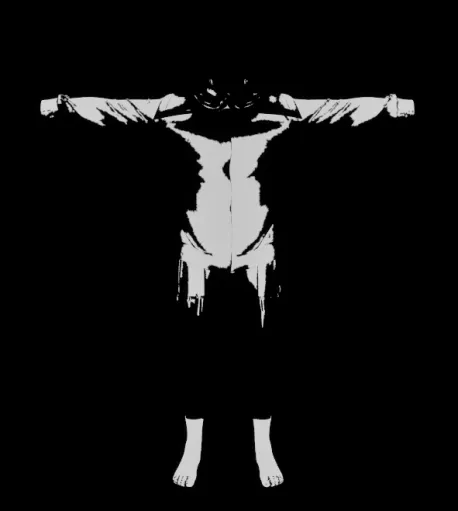
RadiusPercentage and NormalThreshold control the area/unmatched area.
RadiusPercentage: Default value is 0.01, usually corresponding to a smaller search radius. Increasing this value increases the matching area.
NormalThreshold: Default value is 30, increasing this value increases the matching area.
Usually, you should determine the RadiusPercentage value first, then adjust the NormalThreshold. You can understand that the former has a higher priority—if the target vertex cannot enter the SearchRadius, the adjustment of the NormalThreshold is ineffective for this vertex.
NormalThreshold Tuning: Solving Pulling Issues
Typically, for areas where the body is too close, the nearest neighbor algorithm causes pulling. Performing Inpainting on the unmatched areas determined by the default parameter values can partially solve this issue.
.gif)
InPainting
.gif)
K-Nearest Neighbors
However, in some cases, the matching area determined by the default parameter values is too large, resulting in the Inpainting execution result being close to the nearest neighbor, causing unnatural vertex pulling.

NormalThreshold tuning
 Default
In the example below, we reduce the NormalThreshold value, so more vertices need to be recalculated by the InPainting algorithm (more vertices are determined as unmatched). The severely pulled vertex weights in the crotch area are recalculated by the InPainting algorithm, and the pulling is repaired.
Custom InPainting Area: Alleviate Local Penetration
The larger the area where the InPainting algorithm is applied, the more likely it is to cause inconsistency with the character's skinning, resulting in penetration. We provide the function of custom InPainting area, allowing users to use a vertex attribute map to lock the matching attributes of a part of the area. This way, we can lock the vertices prone to penetration and only use the nearest neighbor to transfer weights.
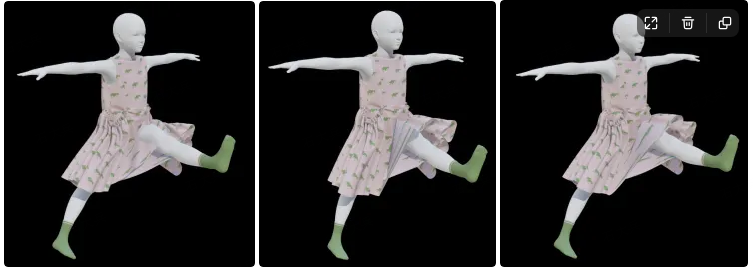
Default Para InPaint K-Nearest Neighbors Custom InPaint Mask
Using Custom InPainting Area Function Requires First Drawing the Corresponding Vertex Weight Attributes
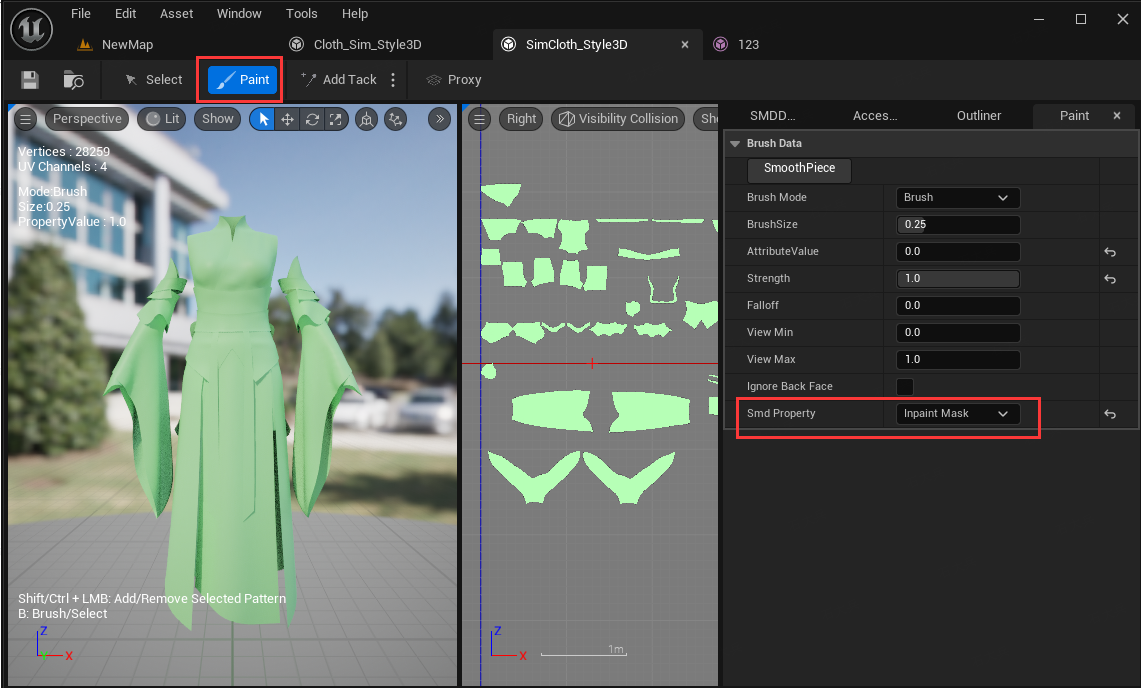
Double-click the SMD asset object to enter the SMD asset editor
Enable the brush tool, then switch the PaintProperty attribute card on the right to Inpaint Mask
Draw attributes, note that the relationship between attribute values and matching lock is:
Attribute Value | Matching Relationship |
|---|---|
0~0.15 | Lock matching area as unmatched |
0.15~0.75 | Use RadiusPercentage, NormalThreshood to generate the matching area |
0.75~1 | Lock matching area as matched |
In actual use, it is recommended to first fill all pieces with 0.5, and then draw with brushes of 0 value or 1 value.
By following these steps and understanding the parameters, you can effectively use the SkinTransfer feature to transfer weights between meshes in Maya, ensuring better weight distribution and fewer issues like vertex pulling and penetration.